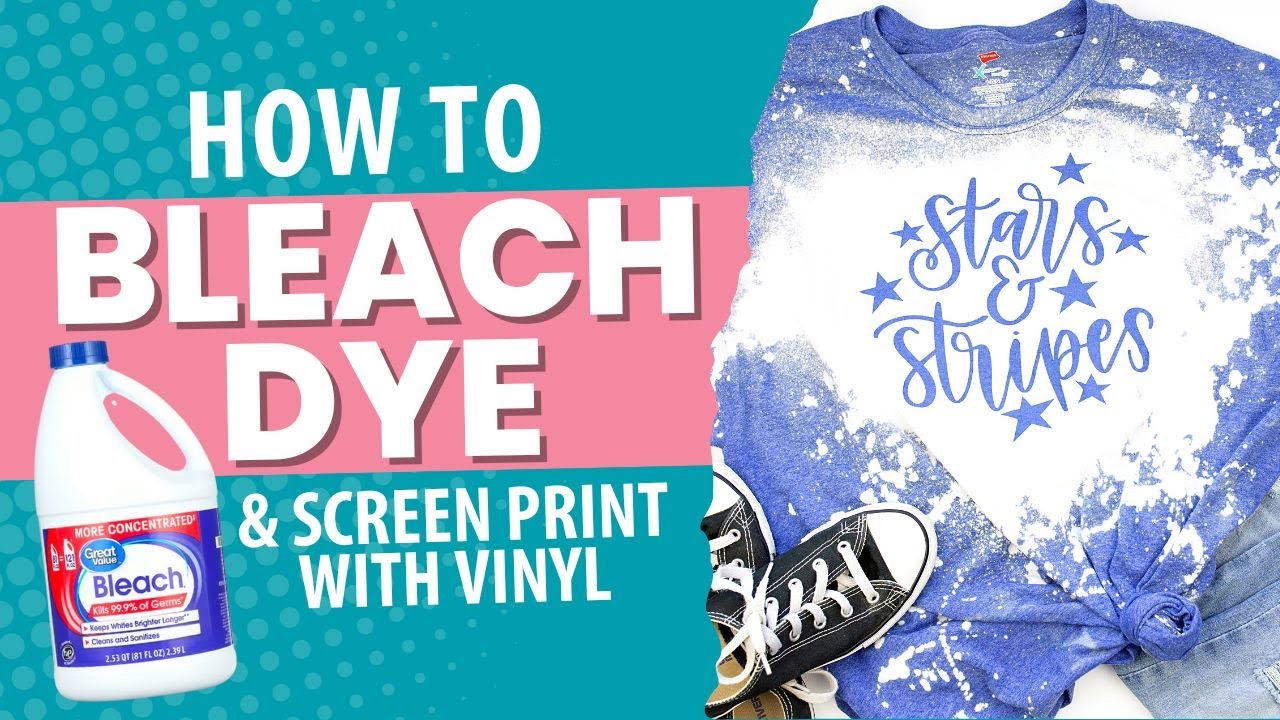
Fill a spray or squeeze bottle with a mixture of 1/2 bleach and 1/2 water. Ad buy jimmie johnson sweatshirts!
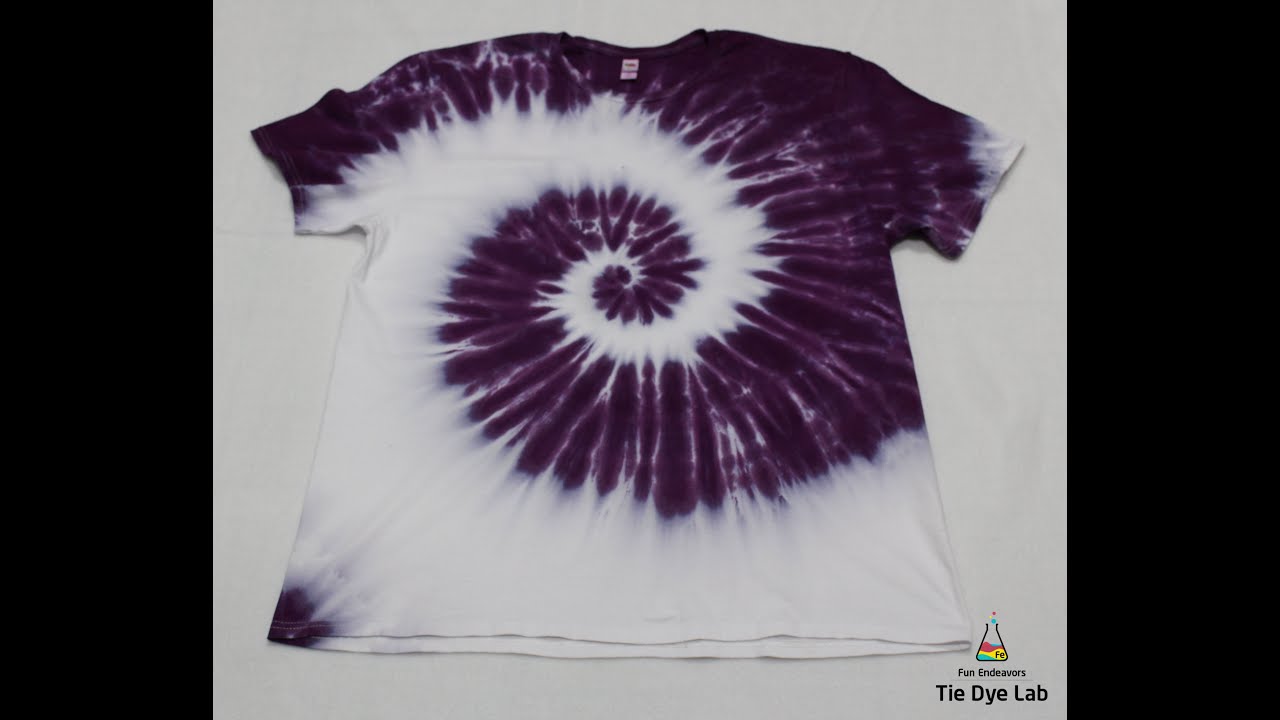
How To Make A Single Color Spiral Tie Dye Shirt Including Tips To Help Keep The White Area White Diy Tie Dye Designs Tie Dye Shirts Patterns Diy Tie Dye Shirts
There are also a bunch of designs and techniques you can use to make a tie dye sweatshirt.
How to tie dye sweatshirt patterns. Check the fixer’s instructions to find out how long to let your sweatshirt soak. Create a tie dye pattern of your choice with your rubber bands. Band up your sweatpants, spacing rubber bands a few inches apart.
Fill your blue one step tie dye bottle with warm water and shake. After a few dms, she. Dye each section a different color, using your tie dye rack to catch excess dye.
I did not want a pattern in my bleach/tie dye. Dye each section a different color, using your tie dye rack to catch excess dye. Image 2 of tie dye sweatshirt from zara tie dye.
Working in a sink, shower you bathtub, prepare your work station. To make the spiral design, pinch the middle of the sweatshirt. Firework tie dye zip up sweatshirt lf stores tie dye.
Dye each section a different color, using your tie dye rack to catch excess dye. Dampen sweatpants, lay out flat, and accordion fold the top of the pants until the legs split. But i went with a classic spiral tie dye design.
Then i crumpled two sections on the bottom, and then two on the top. Instead, place it in the bucket of fixer and let it soak. The jimmie johnson fan shop.
All you need to do is wrap, scrunch, fold, or twist the sweatshirt and tie it up with some rubber bands. Accordion fold each leg independently, creating two accordion fold stacks. The first step is to gather supplies.
How to bleach tie dye a sweatshirt step 1: *for this particular design only two colors of dye were used. A blue toned tie dye kit (or pick whichever colour scheme you like!);
Mix in about 2 to 4 tsp (5 to 10 g) of your chosen powdered procion dye and mix it around with a metal spoon until the dye is dissolved completely. Make sure that your shirt is clean and damp, lay it flat on the covered working surface, then fold it in half lengthwise. While your sweatshirt is in the washer, prepare a bucket of dye fixer and follow the instructions to create the appropriate solution.
The jimmie johnson fan shop. Optional, for if you want to create a design like i did: When your shirt is done washing, do not dry it.
Some tie dye patterns require you to tie in a specific way, but the crumple technique is really up to you. How to tie dye sweatshirt patterns. Pinch the folded shirt where you want to position the center of the spiral, then twist until the entire shirt forms a spiral shape.
Since bleach removes the color, the resulting sweatshirt will be the absence of the dye. Apply the bleach mixture to the exposed fabric of the garment. Ad buy jimmie johnson sweatshirts!
The thing i love about this craft, especially in the age of lockdowns, is that you. We created a swirl with our shirt and rubber bands. Iron on transfer paper & a printer rubber gloves;
A plain white sweatshirt (you want to make sure this is cotton for the best results. Accordion fold the fabric from the bottom up. Free 2day shipping buy followme tie dye pullover hoodie.
For my sweatshirts, i started by crumpling up the arms and securing them with rubber bands. Note that this sweatshirt is navy blue.place your dye (hot water and dying powder) into a dish/bucket and then place the half of the shirt you plan on dying into the bath.see more ideas about tie dye patterns, tie dye, dye.
How To Bleach Tie Dye T-shirts Plus Screen Print With Vinyl - Youtube Tie Dye Vinyl Bleach Tie Dye Screen Printing

Pin On My Polyvore Finds

Galactic Pink Tie Dye Shirt - Black And Pink Spiral Tie Dye T-shirt - Spiral Tye Dye - Swirl Tie Dye Tiedye Tie Dye T Shirts Diy Tie Dye Shirts Black

Pink And Purple Crinkle Tie Dye Shirt Tie Dye T Shirts Tie Dye Shirts Dye T Shirt